How To Use A Torque Wrench Correctly: Step-By-Step Guide
Set the wrench to the correct value, apply steady force, and stop at the click or readout.
I have spent years working in garages and on DIY projects. I know how to use a torque wrench correctly and why it matters. This guide walks you through types of wrenches, step-by-step use, calibration, common mistakes, and real tips from hands-on experience. Read on to learn clear, safe, and repeatable ways to tighten bolts to spec.

Why torque matters and when to use a torque wrench
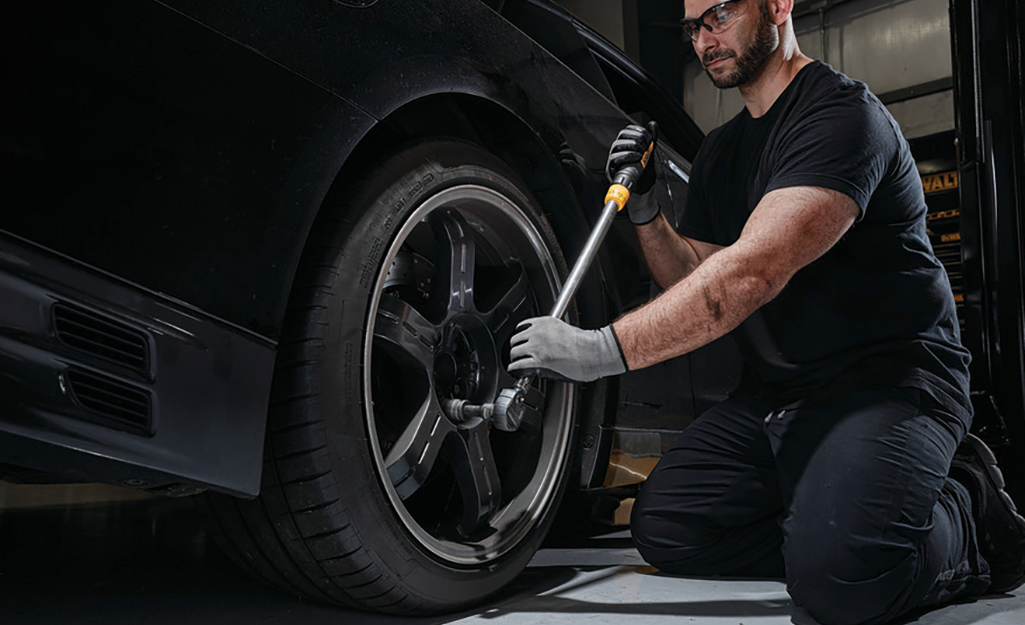
Torque controls how tight a bolt is. Too loose and parts can fail. Too tight and you can strip threads or snap bolts. A torque wrench ensures bolts are tightened to the exact spec. Use one on wheel lug nuts, engine parts, suspension fasteners, and any critical flange. I learned this the hard way after over-tightening a steering arm and needing a new part the same afternoon. Using the right torque keeps parts safe and long-lasting.

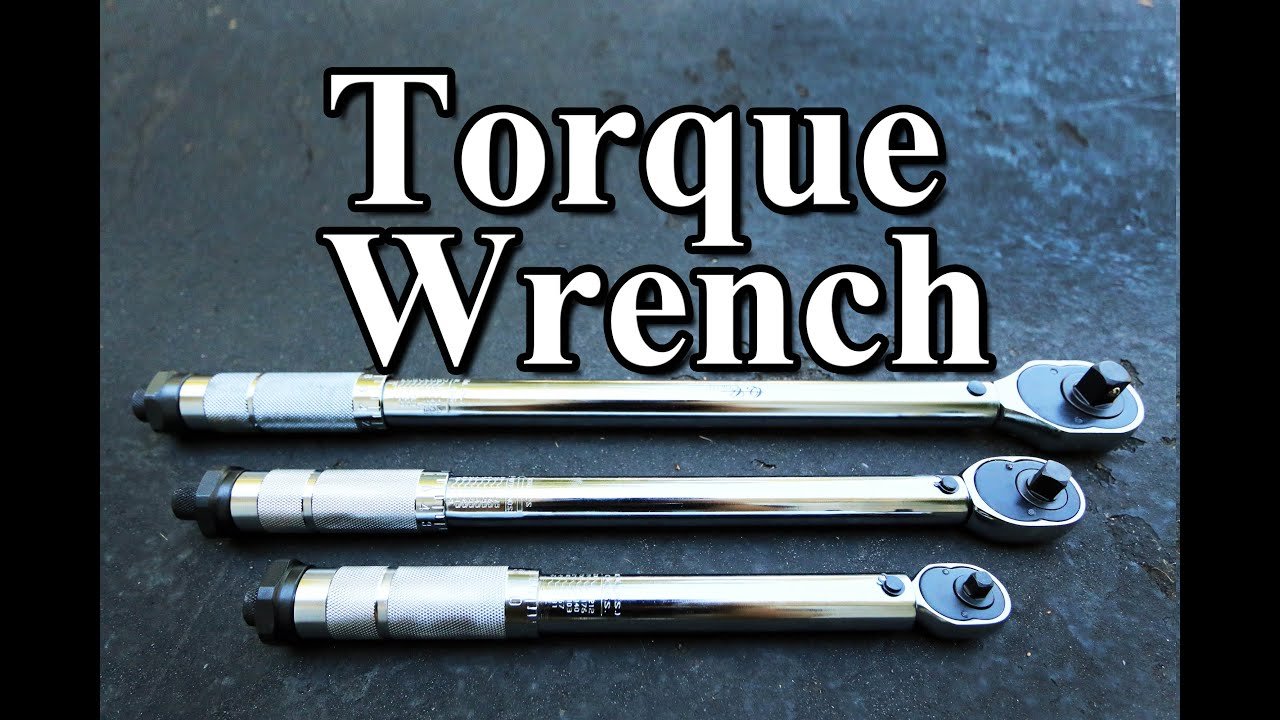
Types of torque wrenches and which to choose
There are a few common types. Pick one that fits your needs.
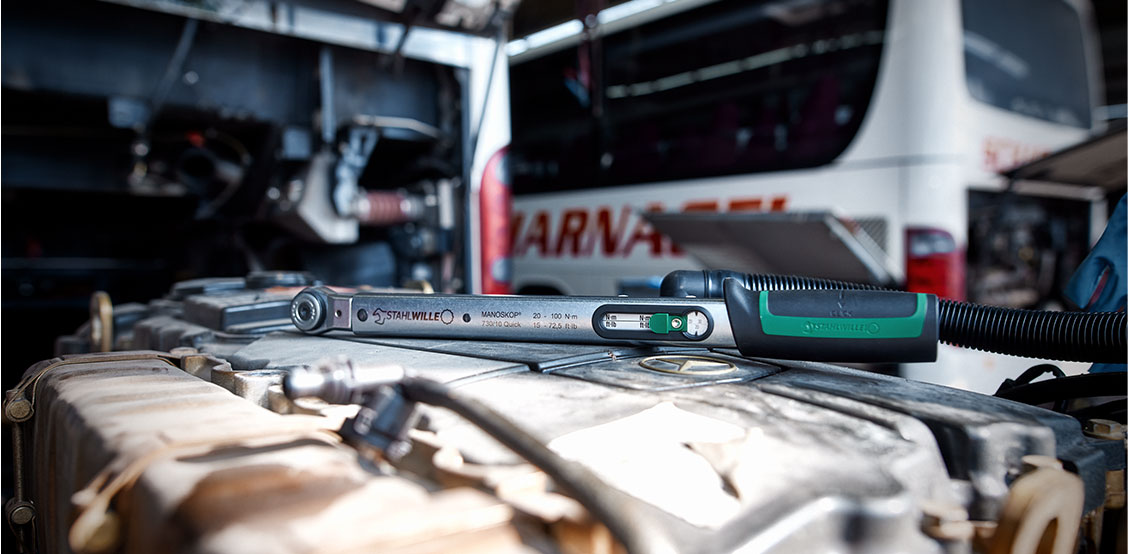
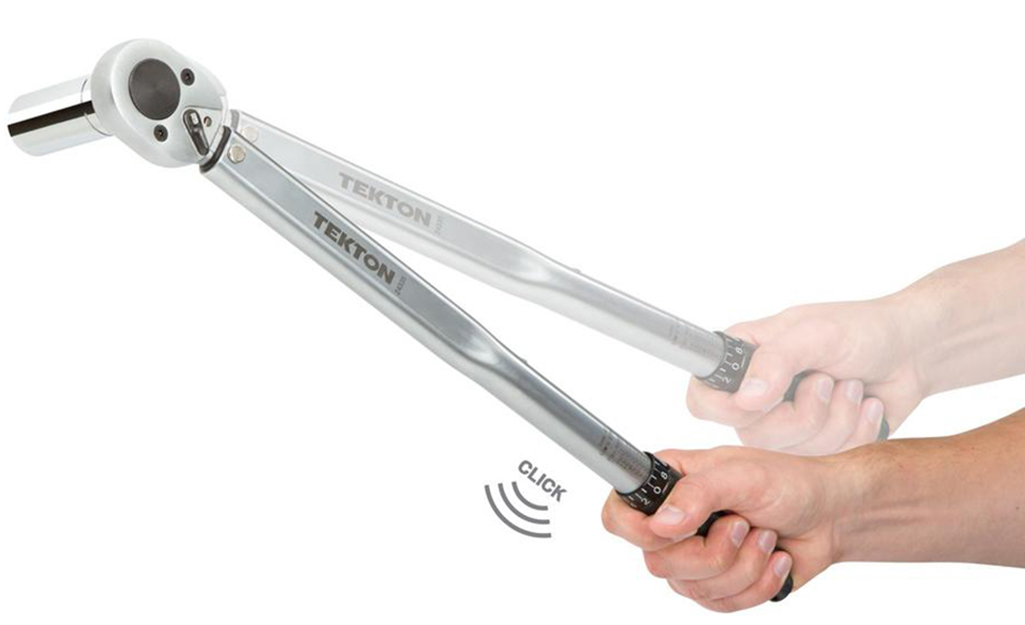
- Click-type torque wrench: Most popular. It clicks when you reach the set torque. It is easy to use and reliable.
- Beam torque wrench: Simple and rugged. It shows torque on a scale as you apply force.
- Dial torque wrench: Precise with a needle and dial. Good for shop work that needs visual proof.
- Digital torque wrench: Shows exact numbers and can store readings. Great for professional or repeatable jobs.
Match the wrench range to the job. If your job is 30 ft-lb, use a wrench with a range that centers on 30 ft-lb for best accuracy. I keep a 10–80 ft-lb wrench for cars and a high-range unit for larger equipment.
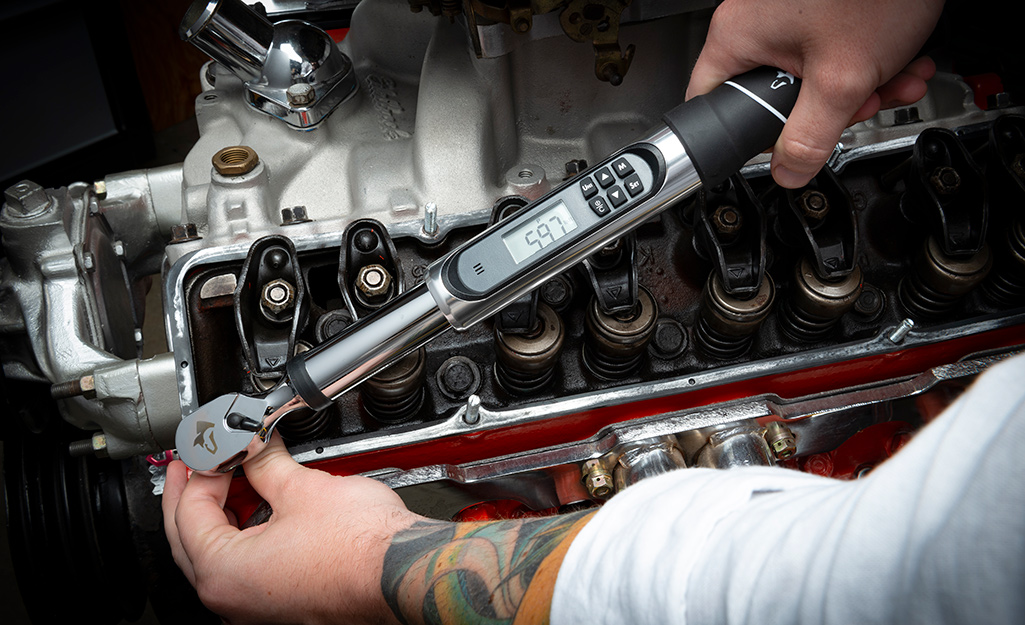
How to use a torque wrench correctly — step-by-step
Follow these steps for safe, accurate torque every time.
- Read the spec
- Find the torque value in the manual. Note the unit: ft-lb or Nm.
- Select the right wrench
- Use a wrench with a range that includes the spec. Avoid low-range use at the top of the scale.
- Set the torque
- For click wrenches, turn the handle to the value and lock it if needed. For digital, input the value.
- Prep the fastener
- Clean threads and apply the correct lubricant if required. Use thread locker only when specified.
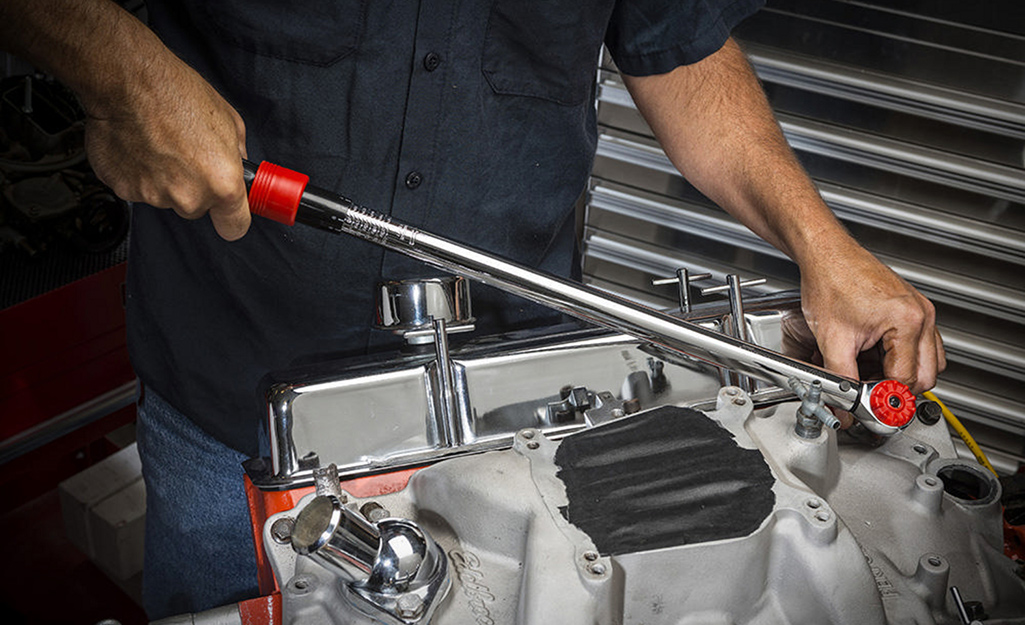
- Use proper technique
- Hold the wrench at the handle end. Pull or push smoothly until the click or readout. Do not jerk.
- Tighten in sequence
- For multi-bolt flanges, follow the pattern and tighten in stages to the final torque.
- Verify and re-check
- If required, re-torque after a short use period as specified by the manufacturer.
I use this routine on every wheel job. It saves time and prevents costly mistakes. When I first started, I sometimes applied torque too fast. That led to false clicks and repeated checks. Slow and steady works best.
Calibration, maintenance, and storage
A torque wrench is a precision tool. Treat it like one.
- Calibration schedule: Send it for calibration once a year or every 5,000 cycles, whichever comes first.
- Before use: Check for damage. Cycle the wrench gently to ensure smooth action.
- After use: Set the wrench back to its lowest setting to relieve spring tension.
- Storage: Keep it in its case, in a dry place. Avoid dropping the wrench.
- Records: Track calibration dates and results for important work.
If you use a torque wrench daily, you may need calibration more often. I keep a simple log with dates and jobs. That has saved me from surprise errors in critical repairs.
Common mistakes and how to avoid them
Avoid these frequent errors when learning how to use a torque wrench correctly.
- Using the wrong range: A wrench works best in the middle of its scale. Pick the correct size.
- Not cleaning threads: Dirt and old lubricant change torque readings. Clean and prep threads.
- Applying force at the wrong point: Always hold the handle. Do not use pipe extenders.
- Relying on guesswork: Tighten to spec, not feel. Use the wrench for critical bolts.
- Skipping calibration: An uncalibrated wrench gives false readings. Keep it checked.
I once used a breaker bar instead of a torque wrench on a hub nut. That split the bearing and cost more time than the wrench would have. Learn from that: use the right tool for torque control.
Understanding torque values, units, and charts
Torque appears as ft-lb or Nm. Know the conversion: 1 ft-lb ≈ 1.356 Nm. Use the correct unit for the spec. Many manuals list both units or show a chart. Use charts to find the correct torque for bolt size and grade when no spec exists. For critical items, always follow the manufacturer’s number. When you know how to use a torque wrench correctly, you avoid guesswork and repeated visits.
Special cases and advanced tips
Some bolts need special care. Learn these rules.
- Torque-to-yield bolts: These stretch and must be replaced once removed. Torque-plus-angle is often used for them.
- Lubricated vs dry threads: Lubricant changes torque needed. Follow the manual.
- Sequence torque: For cylinder heads and wheels, tighten in a star or cross pattern.
- Multiple passes: Tighten in steps (30%, 60%, then 100%) for large flanges.
- Proof torque: Use a calibrated tool when certifying work.
I once rebuilt an intake manifold. Following sequence torque steps prevented warping and gaps. That saved me extra time and a second gasket.

Tools and accessories that help
Use these items to improve accuracy and ease.
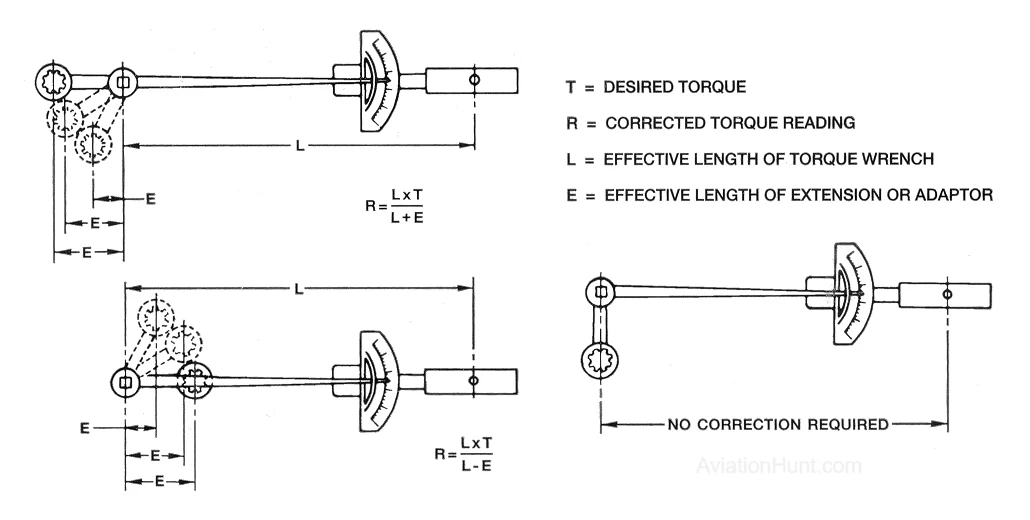
- Torque adapter: Use only matched to your wrench and within range.
- Socket set: Use proper fit sockets, not worn sockets.
- Extension bars: Avoid stubbing as they change effective length and torque reading.
- Angle gauge: Essential for torque-plus-angle bolts.
- Calibration sticker: Mark dates right on the case.
Small accessories can make a big difference. I keep an angle gauge and a quality socket set in my toolbox at all times.
How to use a torque wrench correctly — safety reminders
Safety keeps you and your work safe.
- Wear safety glasses and gloves when needed.
- Secure the workpiece before torquing.
- Use two hands for control if the wrench is large.
- Keep body and face away from potential break points.
- Do not use a torque wrench as a breaker bar.
Respecting these safety rules is part of learning how to use a torque wrench correctly. I have seen bolts break under stress. Proper stance and steady force prevent injuries and damage.
Frequently Asked Questions of how to use a torque wrench correctly
What is the best torque wrench for home use?
A click-type wrench that covers common ranges (10–80 ft-lb) is versatile for home work. It is accurate and easy to use for most car and DIY tasks.
How often should I calibrate my torque wrench?
Calibrate it at least once a year or every 5,000 uses. If you use it daily or in critical work, calibrate more often.
Can I use a torque wrench to loosen bolts?
No, torque wrenches are for tightening. Use a breaker bar or normal ratchet to loosen. Using a torque wrench to loosen can damage its calibration.
Should I lubricate threads before torquing?
Only if the manual specifies. Lubricant changes the torque required. Always follow the manufacturer’s guidance.
What should I do if my wrench slips or misses the click?
Stop and check your setup. Make sure the socket fits, the handle is held correctly, and the wrench is in good condition. Replace or recalibrate if issues persist.
Conclusion
Mastering how to use a torque wrench correctly protects parts, ensures safety, and saves money. Follow the steps: choose the right tool, set the torque, prep threads, use steady force, and keep the wrench calibrated. Try a small, non-critical job to practice your technique. If you found this guide helpful, subscribe for more hands-on tips, or leave a comment with your torque questions.


Very clear and experience based explanation of torque wrench usage. For anyone exploring professional torque wrenches.