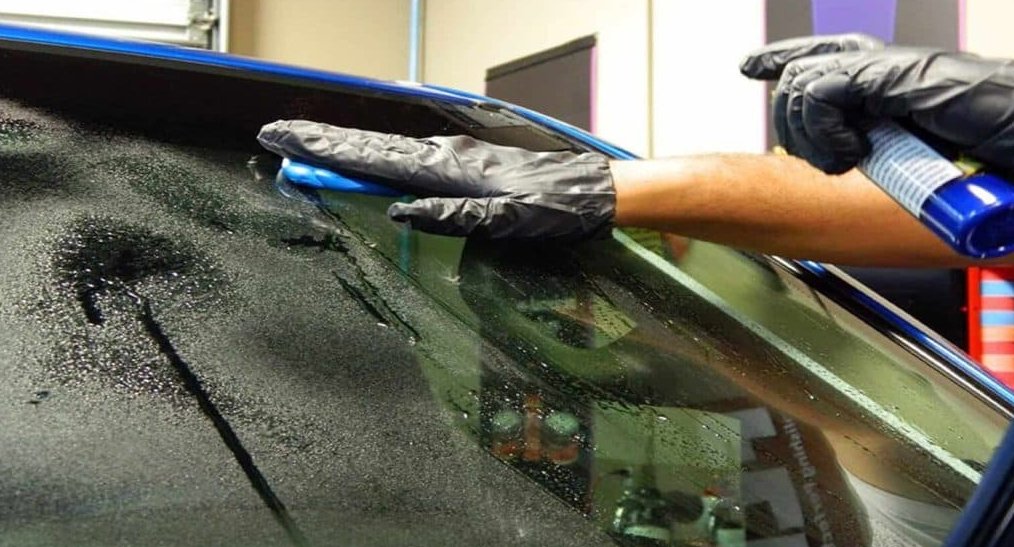
Clay bar removes bonded surface grime; iron remover dissolves embedded iron particles fast and safely.
I have spent years detailing cars and testing products, so I know the difference between a clay bar vs iron remover. This guide breaks down when to use each, how they work, common mistakes, and a step-by-step workflow you can trust. Read on if you want clean paint, fewer scratches, and the best way to remove stubborn fallout without guessing.

How clay bars and iron removers work
A clay bar is a soft, malleable compound that physically picks up surface contaminants. You glide it over lubricated paint and the clay traps tar, overspray, and bonded grime. I used clay bars for years on older cars to remove sticky particles that soap alone could not remove.
An iron remover is a chemical that dissolves iron particles like brake dust and rail dust. It changes color as it reacts, giving a clear visual cue you are removing embedded iron. That color shift happens because the remover’s chelating agents bond with iron and release sulfur-containing compounds as they break the particles down — which is also the source of the distinctive smell many iron removers have. No color change usually means there’s little or no iron contamination left to dissolve.
Both tools are about decontamination, but they use different actions. Choosing the right one or using both in sequence gives the best finish. This is the core of clay bar vs iron remover: one is mechanical, one is chemical.

Clay bar vs iron remover: key differences
- Purpose
- Clay bar removes general bonded contaminants and surface grit.
- Iron remover targets iron fallout and chemically dissolves it.
- Action
- Clay bar uses physical pick-up to remove particles.
- Iron remover uses a chelating or acidic reaction to dissolve iron.
- Time and effort
- Clay bar requires moderate elbow grease and slow passes.
- Iron remover typically works within minutes with little scrubbing.
- Risk of marring
- Clay bar can cause marring if used without lubrication or with dirty clay.
- Iron remover is less abrasive but must be rinsed thoroughly to avoid residue.
- Visual feedback
- Clay gives tactile feedback; you feel the paint get smooth.
- Iron remover often turns purple or red where it dissolves iron.
Understanding these differences helps you decide how to treat paint safely. In my shop, I use iron remover first on very dirty cars, then clay bar for final smoothness. This combo cuts work and reduces the risk of scratching.

When to use each: scenarios and timing
- Use iron remover when:
- You see rust-colored specks in wheels, lower panels, or near wheel arches.
- You feel roughness from iron fallout but want a low-abrasion option.
- The car has rail dust or heavy brake dust buildup.
- Use a clay bar when:
- The paint feels gritty to the hand after washing.
- You want a smoother surface before polishing or waxing.
- Tar, overspray, or sticky contaminants remain after chemical treatment.
- Use both together when:
- The car is very old or neglected and has heavy fallout plus sticky contaminants.
- You want the safest route before polishing delicate paint.
My routine: wash, iron remover, rinse, dry, clay bar with lubricant, then polish if needed. This workflow reduces sanding or aggressive polishing later.

Step-by-step: using an iron remover safely
- Wash the car first
- Remove loose dirt with soap and water to let the iron remover contact fallout directly.
- Test a small area
- Spray a small panel and watch for color change or reaction.
- Apply evenly
- Spray liberally on affected areas and let sit 2 to 5 minutes.
- Agitate if needed
- Use a soft brush on wheels or textured surfaces for stubborn spots.
- Rinse thoroughly
- Flush all product and dissolved particles; do not let residue dry on paint.
- Dry and inspect
- Check for remaining roughness before moving to clay bar or polish.
I once skipped the rinse and left residue on trim. That taught me to always rinse thoroughly and work in sections. Iron remover saves time, but it needs respect and proper rinsing.

Step-by-step: using a clay bar correctly
- Choose the right clay
- Light clay for light contaminants, heavier for very contaminated paint.
- Lubricate well
- Use a dedicated clay lubricant or diluted quick detailer in generous amounts.
- Work small panels
- Fold and knead the clay often so new clean surface touches paint.
- Light pressure only
- Let the clay glide; do not scrub hard to avoid marring.
- Inspect by touch
- Paint should feel glass-smooth when finished.
- Follow with polish or sealant
- Clay leaves paint decontaminated but porous; protect it with wax or sealant.
One trick I use: keep a clean towel nearby and change lubricant if it gets dirty. That keeps the clay working and reduces risk of dragging grit.
Safety, tips, and product selection
- Safety tips
- Work in the shade and on cool paint to avoid product drying.
- Wear gloves and eye protection with strong iron removers.
- Product selection
- Pick a pH-neutral, chelating iron remover for regular paint use — this is the modern standard that replaced older acidic (oxalic-acid-based) formulas. Reserve mildly acidic wheel cleaners for wheels only, and always check compatibility before using them near polished or bare metal.
- Buy clay that matches contamination level; consider clay mitts for speed.
- Practical tips
- Use fresh clay every few cars or when it becomes loaded.
- Replace lubricant or rinse often when using iron remover on wheels.
- Avoid combining strong acids with aluminum wheels without testing first.
I prefer mid-range iron removers that show a vivid color change. They give confidence that the product is working without risking paint. Always read manufacturer directions and patch-test if unsure. If you’re comparing specific products rather than just categories, iron removers like CarPro Iron X and Meguiar’s Ultimate Iron Remover are commonly cited pH-neutral, color-changing formulas, while detailers frequently reach for traditional bars like Meguiar’s Smooth Surface Clay Kit or newer Nanoskin AutoScrub mitts as a faster alternative to a bar. Specific pricing and availability change often, so check current listings before buying, and always confirm a product is labeled safe for your paint or coating type.
Cost, time, and effort comparison
- Cost
- Clay bars cost less per use but wear out; a single clay bar might do 3–5 cars.
- Iron remover bottles cost more but last through many applications.
- Time
- Clay bar takes longer per panel due to manual action.
- Iron remover works quickly but requires rinse and possible agitation.
- Effort
- Clay bar needs steady hands and more physical work.
- Iron remover is lower effort but needs chemical handling care.
For busy detailers, using iron remover first saves time. For hobbyists seeking perfect smoothness, clay bar finishes the job. My workflow balances cost and finish by combining both when needed.
Common mistakes and how to avoid them
- Skipping wash before treatment
- Always wash first to prevent grinding dirt into paint.
- Using clay with no lubricant
- Always use plenty of lubricant to prevent marring.
- Leaving iron remover to dry
- Rinse promptly and work in sections to avoid residue stains.
- Reusing contaminated clay
- Fold and replace clay or switch to a new piece.
- Using aggressive products on delicate finishes
- Test small areas and choose milder formulas for soft or clear-coated paint.
I once used a dirty clay and created swirl marks that required extra polishing. That mistake made me strict about clay care and lubrication.
Which one first: recommended workflow
- Wash the car thoroughly.
- Apply iron remover to dissolve embedded iron fallout.
- Rinse and dry the car.
- Clay bar the paint to remove remaining bonded contaminants.
- Polish, seal, or wax for protection.
This sequence addresses the hardest contaminants chemically first, then removes the rest mechanically. It reduces the risk of clay dragging embedded iron and minimizes marring. For light contamination, you can skip iron remover, but always check by touch.You may see some guides suggest claying before using an iron remover, on the theory that claying “opens up” the paint. In practice, that approach increases risk rather than reducing it — claying over undissolved iron particles drags sharp fallout across the clear coat instead of gliding over a chemically cleaned surface, which is why removing iron first remains the safer, more widely recommended sequence.
Clay Bar vs. Clay Mitt or Towel: Which Should You Use?
Traditional clay bars aren’t the only way to decontaminate paint anymore. Clay mitts and clay towels use the same rubberized-polymer principle as a bar but in a wearable or towel form, and they’ve become a common alternative for home detailing.
- Clay bar — best for heavy or uneven contamination and precise, small-area work, but it must be kneaded, can be dropped and ruined, and works one panel at a time.
- Clay mitt — worn on the hand, covers more surface area per pass, and is easier to control for beginners, making it a faster option for routine maintenance decon.
- Clay towel — similar coverage benefit to a mitt in a towel format, useful for a quick pass without needing to knead or reshape material.
Clay Bar Iron Remover Removes Bonded surface grime, tar, overspray, sap Embedded iron particles (brake dust, rail dust) Action type Mechanical (physical pick-up) Chemical (dissolves via chelation) Contact with paint Direct physical contact, needs lubrication No-contact spray, dwell, and rinse Marring risk Higher if under-lubricated or reused dirty Low, but residue must be rinsed thoroughly Speed Slower, panel by panel Faster, works in minutes Best used After the surface is chemically decontaminated First, before claying
For heavily neglected paint, a traditional clay bar in a finer grade still gives the most control. For regular maintenance decon on a car that already sees an iron remover treatment every few months, a clay mitt or towel is usually the faster, lower-risk choice. Whichever tool you choose, the lubrication and light-pressure rules from the steps above still apply.
Frequently Asked Questions of clay bar vs iron remover
What does an iron remover remove that a clay bar can’t?
Iron remover dissolves microscopic iron particles that embed into clear coat. Clay bars can lift some of these, but chemical removal is more thorough for iron fallout.
Can I use iron remover on wheels and paint?
Yes, many iron removers are safe for paint and wheels when used as directed. Always patch-test and rinse thoroughly, especially on aluminum or delicate finishes.
Is clay bar safer than polishing?
Clay bar is less aggressive than polishing and removes surface contaminants without removing clear coat. However, it can still cause minor marring if used incorrectly, so lubrication and technique matter.
How often should I decontaminate my car with clay bar or iron remover?
For daily drivers, consider iron remover and clay every 3 to 6 months depending on environment and feel. Cars in heavy-traffic or industrial areas may need more frequent treatment.
Can I skip clay bar if I use iron remover?
No, iron remover targets iron fallout only. Clay bar removes other bonded substances like tar and overspray, so skipping clay can leave contaminants behind.
Does a clay bar remove scratches?
No. A clay bar removes surface contaminants sitting on top of the paint, not material from the clear coat itself, so it won’t fix scratches or swirl marks. Very light marks may look slightly less noticeable once surrounding grime is gone, but genuine scratch correction requires polishing or compounding, not claying.
Is it safe to use iron remover and clay bar on a ceramic-coated car?
Most modern iron removers and fine-grade clay products are formulated to be safe on ceramic coatings, but always confirm the specific product is labeled coating-safe before use. Using a coarse clay grade or an aggressive acidic wheel cleaner near a coated panel can shorten the coating’s lifespan, so stick to fine-grade clay and pH-neutral, coating-safe iron removers on coated vehicles.
Should I use a clay bar or a clay mitt?
A clay mitt is usually the better choice for routine maintenance decon since it’s faster and covers more area per pass. A traditional clay bar is worth reaching for on heavily contaminated or neglected paint, where its more targeted mechanical action can be an advantage. See the clay bar vs. clay mitt section above for more detail.
Conclusion
Choosing between clay bar vs iron remover is not about picking a winner. It is about using the right tool at the right time. Use iron remover to dissolve iron fallout, then use a clay bar to finish and smooth the surface. Follow safe steps, test products, and protect your work with polish or sealant for lasting results. Try the recommended workflow on one panel today, and you will see and feel the difference — then share your experience or ask questions to refine your process.