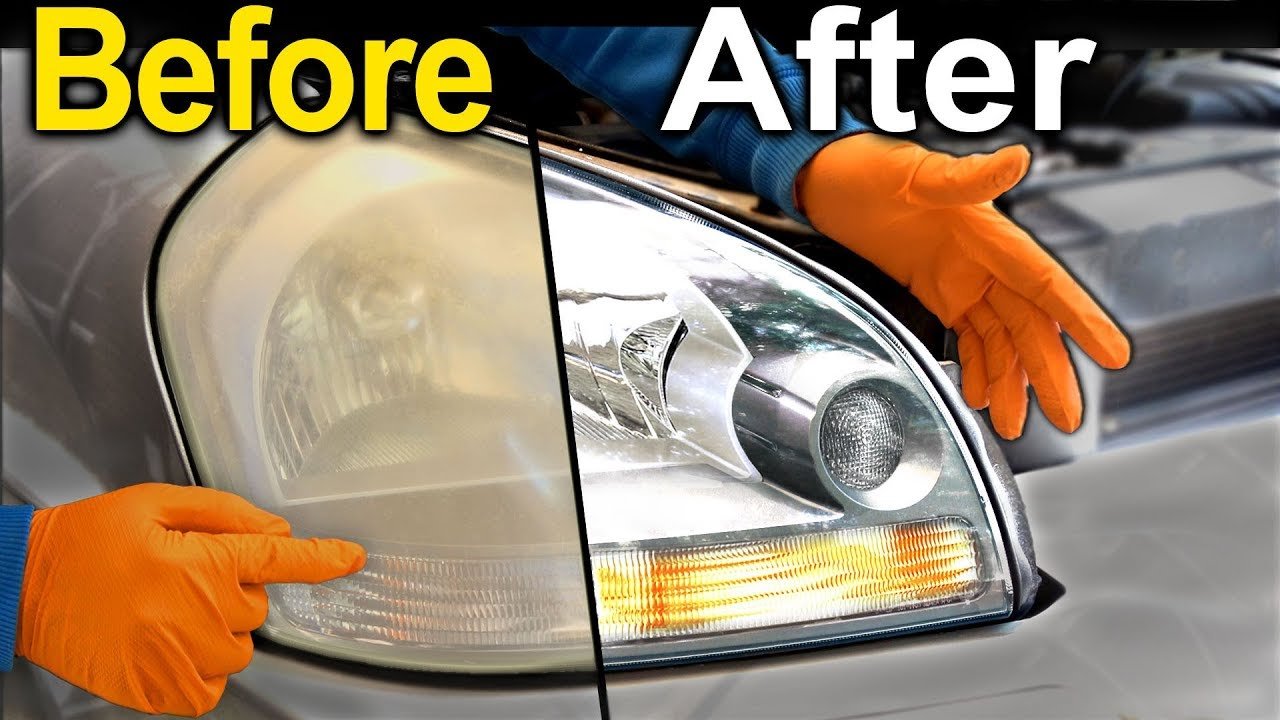
Use sandpaper or a restoration kit, polish, then seal the lens for clear headlights.
I’ve spent years restoring lenses in my garage, and I’ll walk you through how to polish car headlights at home with clear steps, cheap tools, and safe tips. This guide shows easy options, mistakes to avoid, and real results you can trust. Read on to get brighter lights tonight.
Why headlights get cloudy and why it matters
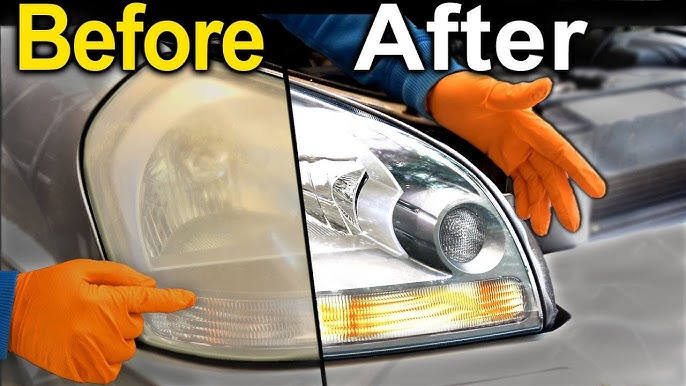
Plastic headlight lenses yellow and haze over time from sun, road grime, and heat. UV rays eat away at the clear coat. Tiny scratches and oxidized plastic make the light scatter.Cloudy lenses cut brightness significantly and make night driving less safe — degraded lenses can meaningfully reduce how far your headlights actually illuminate the road, which is why restoring clarity is a safety task, not just a cosmetic one Knowing this helps you see why learning how to polish car headlights at home is worth the time and small cost.
Top headlight restoration kits worth buying
If you’d rather not assemble your own sandpaper progression, several kits bundle everything you need. A no-drill kit (like Sylvania’s) is the easiest starting point and works entirely by hand. A drill-based kit (like 3M’s) uses graduated sanding discs and tends to cut restoration time significantly on heavily oxidized lenses. If you want the longest-lasting seal, ceramic-coated restoration kits are a newer category that claim extended protection compared to a standard UV sealant. On a budget, Turtle Wax’s kit remains one of the most affordable complete options.
| Kit type | Drill required? | Best for |
|---|---|---|
| No-drill kit | No | Beginners, light-to-moderate haze |
| Drill-based kit | Yes | Heavy oxidation, faster results |
| Ceramic kit | No (typically) | Longest-lasting protection |
| Budget kit | Varies | Light haze, cost-conscious buyers |
Tools and materials you’ll need
You can pick a simple kit or use household items. Below are reliable tools I use and recommend.
- Sandpaper assortment: 400, 800, 1000, 2000 grit for wet sanding.
- Masking tape to protect paint and trim.
- Plastic or glass cleaner to remove grease.
- Polishing compound or rubbing compound.
- Microfiber cloths for final buffing.
- Drill with polishing pad or hand applicator for small jobs.
- UV sealant or headlight clear coat to protect results.
If you prefer a quick job, toothpaste or a dedicated headlight kit can work. I keep both a kit and sandpaper set in my garage for different levels of haze. Practicing on one headlight first helps.
Which tool works best: hand, drill, sander, or sponge?
A hand pad works for light haze, a drill speeds up heavy oxidation, and a sander or sponge each have narrower use cases.
If your headlights are only lightly hazed, a hand-applied pad or cloth gets the job done without extra equipment — it just takes more elbow grease and time per panel. For heavier oxidation, attaching your sanding and polishing pads to a power drill cuts the work down significantly, since the drill keeps consistent pressure and speed across the lens. A random orbital sander can work too, but it’s easy to apply uneven pressure with one if you’re not used to it, so go slow and keep it moving. A sponge or foam applicator is best reserved for the final polishing compound step, not the sanding stages — it doesn’t have enough grip to cut through oxidation on its own.
Before you start, it helps to mark the worst spots on the lens with a piece of tape or a light pencil mark so you don’t lose track of them once the surface is wet and hazy from sanding.
Step-by-step: how to polish car headlights at home
Below are three common methods. Pick one based on how cloudy your lenses are and what tools you have.
Do you need to lubricate headlights when wet-sanding?
Yes — keep the surface wet while sanding, either with plain water or a dedicated spray lubricant, to avoid scratching the lens.
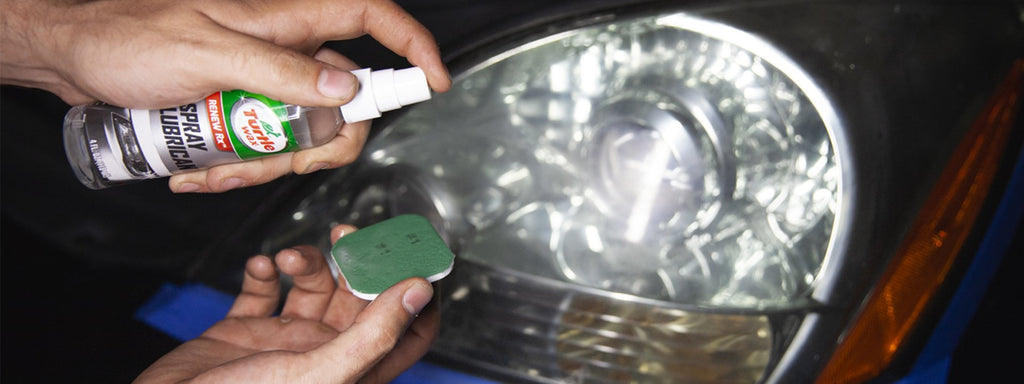
“Lubricating” during headlight restoration isn’t a separate step — it just means keeping the sandpaper and lens wet while you sand. This prevents the sandpaper from digging in unevenly and helps clear away the plastic residue as you go. Plain water works fine for this and is the cheapest option if you’re on a budget. Some kits include a dedicated spray lubricant instead, which can make the sanding feel smoother, but it isn’t required — a spray bottle of water does the same job.
Method 1 — Full sanding and polish (best for heavy oxidation)
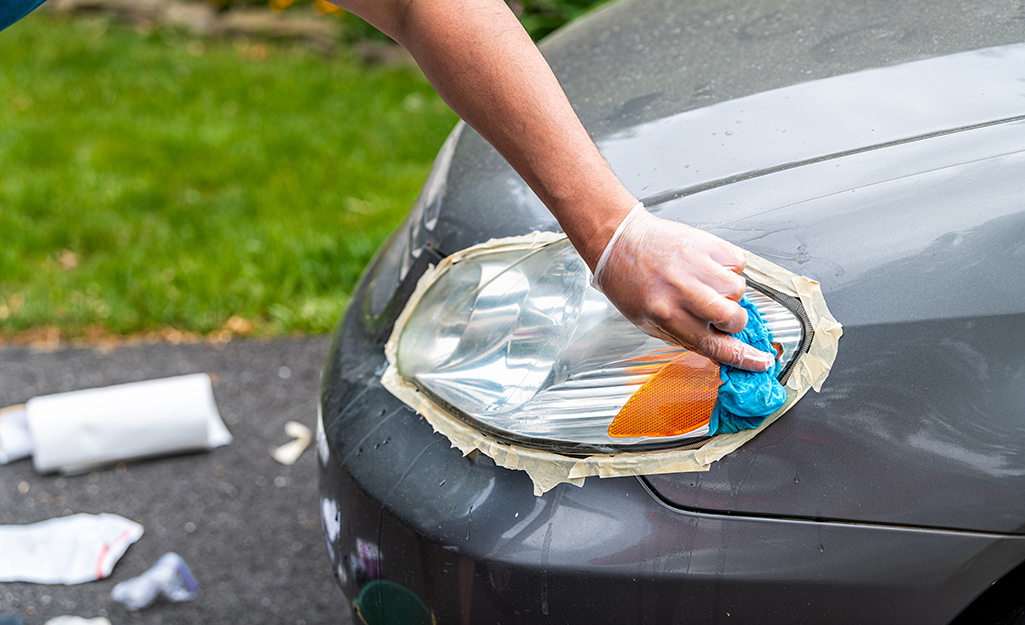
- Wash the headlight and dry it. Remove surface dirt.
- Tape the surrounding paint to avoid scratches.
- Start with 400 or 600 grit wet sandpaper. Sand in even horizontal strokes.
- Move to 800, then 1000, then 2000 grit. Keep the surface wet.
- Wipe clean and apply polishing compound.
- Use a microfiber pad or drill polisher to buff until clear.
- Apply a UV sealant or headlight clear coat to protect the work.
This is the most reliable way to restore clarity. I use this method for older cars and get near-new results.
Method 2 — Toothpaste or baking soda (quick fix)
- Clean the lens and remove grime.
- Apply a dab of non-gel toothpaste or a paste of baking soda and water.
- Rub with a cloth in circular motions for several minutes.
- Rinse and dry. Apply a temporary protectant if you have one.
This method works for light haze. It’s cheap and fast, but results fade quicker. I used it once before a night drive and it helped enough to be safe.
Method 3 — Store-bought restoration kits
- Follow the included steps: usually light sanding, polishing, and sealing.
- Kits bundle pads and compounds. They are beginner friendly.
Kits balance ease and durability. They often include a UV coat for lasting results.
Method 4 — Hand polishing without a drill
- Wash the headlight and dry it completely.
- Tape the surrounding paint to protect it.
- Apply your chosen abrasive pad or fine sandpaper by hand, using firm, even, horizontal strokes. Keep the surface wet throughout.
- Work through each grit the same way you would with a drill — just expect each stage to take longer.
- Wipe the lens clean and apply polishing compound with a microfiber cloth, working it in small circles until the haze clears.
- Finish with a UV sealant or headlight clear coat, the same as any other method.
Hand polishing takes more time and physical effort than using a drill, but it gives you more control, which is useful if you’re working on a headlight with an unusual shape or curve. It’s also the safer starting point if you’ve never restored a headlight before, since there’s less risk of sanding through a spot too fast.
Can you use household products or regular car polish instead of a kit?
Most household substitutes only mask haze temporarily — a real restoration kit or proper sanding process is what actually removes it.
People often ask about substitutes because a full kit feels like overkill for mild haze. Here’s how the common ones actually hold up:
- General car polish or wax: These are formulated for painted surfaces, not oxidized plastic. They can add a temporary shine but won’t remove the cloudy layer underneath.
- Glass polish: Headlight lenses are polycarbonate plastic, not glass, so glass-specific polish isn’t designed for this surface and won’t cut through oxidation the way a plastic-safe compound will.
- Cut-and-polish (rubbing) compound: This can help with very light haze in a pinch, similar to toothpaste — it’s an abrasive, just not one designed specifically for headlights, so results are inconsistent and it won’t outperform a proper restoration kit.
- All-purpose polishes (like Nu Finish and similar products): These can add short-term shine but aren’t a substitute for removing oxidation — treat them the same way as a temporary fix, not a restoration.
- Hair conditioner or sodium silicate: There’s no reliable evidence these restore headlight clarity, and sodium silicate in particular isn’t something to apply without knowing what you’re doing — skip both.
- Headlight polish pens: These are a real, budget-friendly product category built for touch-ups on very light haze. They’re not a substitute for a full kit on heavily oxidized lenses, but they’re a reasonable low-cost option to keep in the glovebox for minor upkeep.
If your headlights are more than lightly hazed, a proper restoration kit or the sanding process outlined above will get you further than any of these substitutes.

Safety tips and common mistakes
Stay safe and avoid redoing work. Keep these points in mind.
- Wear gloves and eye protection. Sanding creates dust and grit.
- Use a mask when working with compounds or spray clear coats.
- Don’t skip the UV sealant. Polished plastic re-oxidizes fast without protection.
- Avoid aggressive sanding near painted edges. Tape generously.
- Test on a small area first. Over-sanding can cause a rough finish.
I once sanded too long on one corner and learned to check frequently. Short, steady passes work best.
Maintenance and prevention after you learn how to polish car headlights at home
A little upkeep keeps lights bright longer.
- Wash headlights when you wash your car to remove grit.
- Apply a UV protectant every 3–6 months to slow yellowing.
- Park in shade when possible to reduce sun damage.
- Inspect for chips or cracks; replace if the lens is damaged beyond fix.
After polishing, I schedule a quick protectant wipe every season. With regular upkeep, results typically hold up for 6 to 12 months before needing another full pass.

Cost comparison: DIY versus professional restoration
Here’s a quick view to help decide.
- DIY with household items: $0–$20. Fast but often short-lived.
- DIY with a kit or proper tools: $20–$60. Good lifespan when sealed.
- Professional service: $80–$250. Best results and warranty options.
If you plan to learn how to polish car headlights at home, a one-time investment in sandpaper and a polish can pay off many times over. Professionals help when the lens is damaged or you want a guaranteed finish.
Frequently Asked Questions of how to polish car headlights at home
What is the fastest way to polish car headlights at home?
Using a dedicated headlight restoration kit is usually the fastest and easiest route. Kits bundle pads and polish and often include a UV protectant.
Can I use toothpaste to polish headlights?
Yes, toothpaste can remove light haze as a temporary fix. It’s cheap and works well for mild clouding but won’t last as long as proper polish and sealant.
How long does a DIY polish last?
With a proper UV sealant, results often last 6–12 months or longer. Without protection, oxidation can return in a few months.
Is sanding necessary to restore headlights?
Sanding is best for heavy oxidation and deep scratches. For mild haze, polishing alone can help. Sanding gives the most consistent clarity.
Will polishing headlights improve night visibility?
Yes. Polished and sealed headlights let more light through and reduce glare scatter. This improves visibility and road safety.
How many times can you polish headlights?
Sanding removes a thin layer of the plastic lens each time, so headlights can only be restored a limited number of times — typically a handful of full restorations over the life of the car — before the lens becomes too thin to sand safely. This is part of why the UV sealant step matters: protecting your work after restoring reduces how often you need to sand again in the first place.
Conclusion
Polishing headlights is a small project that makes a big difference. You can learn how to polish car headlights at home with simple tools, clear steps, and a little care. Start with a test lens, follow the steps above, and always seal the work to protect it. Try one method today, compare results, and share what worked. If you found this useful, subscribe, leave a comment, or check out our guide to choosing the right car wax for your paint as your next detailing project.