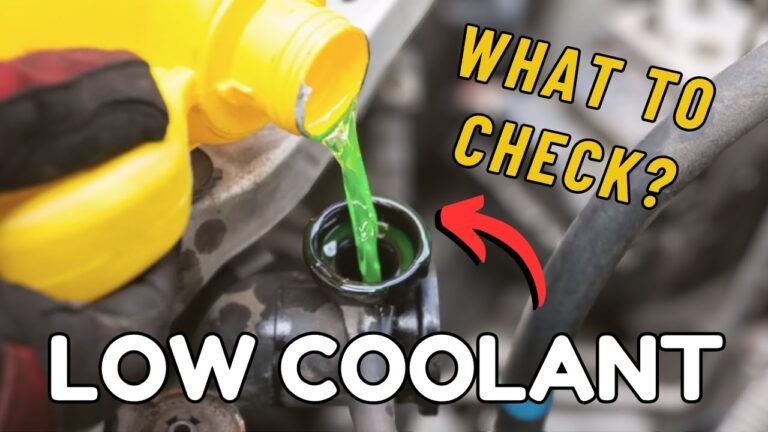
The best way to find a coolant leak is to check the coolant level when the engine is cold, inspect common leak points, and perform a cooling system pressure test. Use UV dye or internal leak tests when the source remains hidden.
For drivers across the United States, a coolant leak can become a serious problem during a daily commute, a summer road trip, or a long drive through heavy traffic. Hot weather, stop-and-go driving, and long highway trips can place extra demands on a vehicle’s cooling system. A small leak may seem harmless at first, but losing coolant can cause the engine to overheat. That can lead to costly engine damage.
Finding the source is not always easy. Coolant may drip onto the ground, collect under an engine cover, or evaporate on a hot engine part. Some leaks occur only when the engine is warm and the cooling system is under pressure. Others happen inside the engine or behind the dashboard, where a simple visual check will not find them.
A careful diagnosis should begin with the easiest and safest checks. Look for falling coolant levels, wet spots, dried residue, damaged hoses, and signs around the radiator and water pump. If the source is not clear, a pressure test can help reveal a small leak. A mechanic may also use UV dye, a combustion gas test, or other diagnostic tools to check for internal damage.
The goal is to find the actual source before replacing parts. This guide explains how to inspect the cooling system, read pressure test results, recognize hidden leaks, and decide when professional testing is needed. It also explains what to do if the temperature gauge rises or coolant disappears without leaving a puddle.
Source: tyrolsport.com
What Is Coolant Leak Diagnosis?
Coolant leak diagnosis is the process of finding where engine coolant escapes from a vehicle’s cooling system. The process includes checking visible parts, measuring coolant loss, testing system pressure, and looking for signs of internal leakage.
The cooling system moves coolant through the engine and radiator. A water pump keeps the fluid moving. The radiator releases heat, while the thermostat helps control coolant flow as the engine warms up. Hoses, seals, fittings, and a pressure cap help keep the system sealed.
Most modern vehicles use a pressurized cooling system. Pressure helps raise the coolant’s boiling point and supports proper heat transfer. However, pressure can also force fluid through a weak seal, cracked hose, or damaged connection.
A leak can occur in almost any part that holds or carries coolant. The source may be easy to see, such as a split radiator hose. It may also be difficult to reach, such as a heater core behind the dashboard.
External coolant leak
Coolant escapes from a visible part, such as a hose, radiator, reservoir, water pump, or gasket. It may leave a puddle, wet surface, or dried residue.
Internal coolant leak
Coolant enters an engine passage, combustion chamber, oil system, or another enclosed area. The vehicle may lose coolant without leaving a puddle.
Intermittent coolant leak
The leak appears only under certain conditions, such as high engine temperature, system pressure, road vibration, or heavy engine load.
Why Finding The Exact Source Matters
Adding coolant may bring the reservoir back to its normal level, but it does not repair the problem. If the leak continues, the engine can lose enough coolant to overheat. Repeated overheating can damage the cylinder head, head gasket, or engine block.
Correct diagnosis also prevents unnecessary repairs. Replacing a radiator will not fix a leaking heater hose. Replacing a head gasket without testing can waste money when the real problem is a damaged coolant outlet or water pump seal.
Common Signs Of A Coolant Leak
The first clue is often a coolant level that keeps falling. Other signs include a sweet smell, colored fluid under the vehicle, steam from the engine bay, or a temperature gauge that rises above its normal range.
Some vehicles show a low coolant warning on the dashboard. Others may have a temperature warning without a separate low-level warning. Check the owner’s manual to understand what each warning means for your vehicle.
Do not wait for the engine to overheat before checking the cooling system. A small leak can exist for days or weeks before it causes an obvious temperature problem.
Falling coolant level
The coolant reservoir drops below its usual cold level between checks. A repeated drop is stronger evidence of coolant loss than one low reading.
Sweet coolant smell
A sweet odor around the engine bay or inside the cabin can point to leaking coolant. The smell may become stronger after driving.
Colored fluid under the vehicle
Coolant may appear green, orange, pink, yellow, blue, or another color. The exact color depends on the coolant formula and dye.
Dried coolant residue
White, pink, orange, or colored deposits around a hose connection, radiator seam, or water pump can show where coolant has dried.
Steam from the engine bay
Steam may appear when coolant escapes onto hot engine parts. Stop the engine if overheating or active coolant loss occurs.
Poor cabin heat
A low coolant level or air trapped in the cooling system can reduce heater performance. A leaking heater core can also cause a sweet smell or wet carpet.
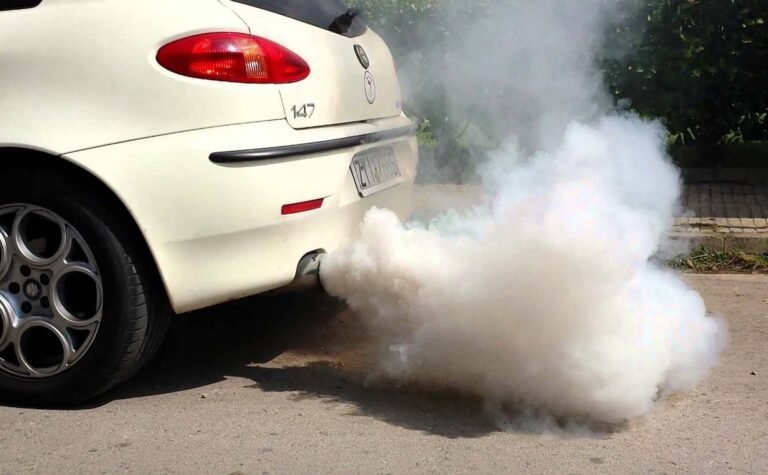
Persistent white exhaust
Thick white exhaust after the engine reaches normal temperature, especially with falling coolant levels, may point to coolant entering the combustion chamber.
Can Coolant Leak Without Leaving A Puddle?
Yes. A small leak can spray onto a hot engine surface and evaporate before reaching the ground. Air from the cooling fan or airflow while driving can also spread the fluid across nearby parts.
An engine cover or underbody shield may catch leaking coolant. This can hide the actual source and make the driveway look dry.
A heater core leak is another possibility. The coolant may enter the cabin through the heating and air conditioning system. Look for a sweet smell from the vents, damp passenger-side carpet, or a greasy film on the inside of the windshield.
How To Tell Coolant From Other Vehicle Fluids
Do not identify a fluid by color alone. Coolant formulas come in several colors, and other vehicle fluids can look similar. Check the coolant reservoir and compare the suspected leak with the fluid already in the vehicle.
Air conditioning condensation is usually clear water. It often drips beneath the passenger area after the air conditioner runs. This is normally harmless and does not cause the coolant reservoir to lose fluid.
Oil usually feels slippery and leaves a greasy mark. Transmission fluid may appear red or brown, depending on its age and type. If you cannot identify the fluid safely, have a technician inspect it.
Safety Steps Before Inspecting The Cooling System
Let the engine cool completely before opening any part of the cooling system. Hot coolant can remain under pressure after the engine stops. Opening a radiator cap or pressurized coolant reservoir too soon can release boiling liquid and steam.
Park on a level surface, switch off the engine, engage the parking brake, and remove the key. Wait until the engine is fully cold before checking the coolant level or removing a cap.
Wear protective gloves and safety glasses. Keep your hands away from cooling fans, belts, and other moving parts. Electric cooling fans can start without much warning on some vehicles.
Never run an engine inside a closed garage. Exhaust gases can build up and cause carbon monoxide poisoning. If an engine must run for a test, work outdoors or use suitable professional exhaust extraction.
Never open a hot radiator cap
Wait for the engine to cool fully. Follow the owner’s manual for the correct location and procedure for checking coolant.
Keep coolant away from children and pets
Many automotive antifreeze products contain ethylene glycol. Swallowing even a small amount can cause serious poisoning. Clean spills at once and keep animals away.
Do not crawl under an unsupported vehicle
Use properly rated jack stands on a suitable surface if underbody inspection is required. A vehicle supported only by a jack can fall.
Stop if the engine overheats
Pull over safely, switch off the engine, and arrange a tow if the temperature warning appears, steam develops, or coolant escapes rapidly.
When Should You Stop Driving?
Stop driving if the temperature gauge enters the red zone, an overheating warning appears, or steam comes from under the hood. Do not keep driving to reach the next gas station or repair shop.
A sudden loss of cabin heat while the engine temperature rises can also point to a serious coolant problem. Pull over safely and shut down the engine.
Do not remove the cap to release pressure. Wait for the vehicle to cool and arrange professional help. Continuing to drive with too little coolant can cause severe engine damage.
How To Find An External Coolant Leak
Start with a cold visual inspection. You do not need advanced equipment to find many common leaks. A bright flashlight, inspection mirror, clean cloth, and a piece of clean cardboard can help.
First, check the coolant reservoir level and look for cracks around its body and connections. Inspect the cap and the small hose that connects the reservoir to the cooling system. Look for wet areas, stains, or dried deposits.
Next, inspect the upper and lower radiator hoses. Pay close attention to the ends where the hoses connect to the radiator and engine. A hose may develop a small crack near a clamp even when the rest of the rubber looks normal.
Look across the radiator core and side tanks. Check the seams, drain area, filler neck, and hose connections. Road debris, corrosion, age, and vibration can damage radiator parts.
Move on to the thermostat housing and coolant outlet connections. These areas often have seals or gaskets that can weaken over time. Check around bolts and joints for dried coolant marks.
Inspect the water pump area as well. Many water pumps have a small drain opening called a weep hole. Coolant coming from this opening can point to a failing pump seal. Do not assume the pump is bad based on noise alone; confirm the source.
If the leak remains hidden, check the underside of the engine and any removable splash shield. Coolant can travel along a hose, bracket, or engine surface before it drips onto the ground. The puddle may not be directly below the damaged part.
Source: tvh.com
Radiator hoses
Look for splits, swelling, soft areas, cracks, and damp spots around clamps and fittings.
Radiator and filler neck
Check the core, plastic tanks, seams, filler neck, and drain plug for wet spots or dried coolant.
Coolant reservoir
Inspect the tank walls, seams, cap, overflow pipe, and connecting hose for cracks or seepage.
Water pump
Look around the pump body, gasket, shaft area, and weep hole for coolant residue.
Thermostat housing
Check the housing, gasket, bolts, and nearby coolant outlets for leaks.
Engine block and heater hoses
Inspect accessible core plugs and the heater hose connections near the firewall for dampness or corrosion.
Use Cardboard To Track A Drip
Place a clean piece of cardboard under the parked vehicle after it has cooled. Leave it in place for a period while the vehicle remains parked. Check the cardboard for fresh drops.
Note the color, location, and approximate amount of fluid. This can help narrow down the area that needs inspection.
Remember that a drip location is only a clue. Coolant may travel along the underside of the vehicle before it falls. Do not run the engine just to create a leak if there is an overheating warning or an active coolant loss.
Check For Leaks That Appear After Driving
Some leaks only appear when the system becomes hot and pressurized. A weak hose connection or small radiator crack may stay dry while the engine is cold.
After the vehicle has cooled completely, inspect the area for fresh wetness and dried coolant traces. If the problem appears only after a drive, tell the mechanic when it happens. That detail can help guide a controlled pressure or heat-related test.
How To Perform A Cooling System Pressure Test
A cooling system pressure test is one of the most useful ways to find a small coolant leak. It uses a hand-operated pump and pressure gauge to apply controlled pressure to the cooling system while the engine is off.
The added pressure can make a weak seal or small crack release coolant. This makes it easier to spot leaks that may not appear during a normal visual inspection.
You need a cooling system pressure tester, the correct adapter for the vehicle, protective gloves, safety glasses, and the manufacturer’s service information. Some vehicles use a radiator filler neck. Others use a pressurized expansion tank with a special adapter.
The correct test pressure and test duration depend on the vehicle. Never assume that every car uses the same pressure. Follow the manufacturer’s service procedure and never exceed the specified limit.
Source: garagesee.com
Step 1: Let the engine cool
Switch off the vehicle and wait until the cooling system is fully cold. Never remove a pressure cap from a hot system.
Step 2: Check the coolant level
Follow the vehicle service instructions to confirm the system has the correct coolant level before testing.
Step 3: Attach the correct adapter
Fit the pressure tester to the radiator neck or expansion tank using the correct vehicle-specific adapter. Make sure the connection seals properly.
Step 4: Apply controlled pressure
Pump slowly until the gauge reaches the pressure specified by the vehicle manufacturer. Never pump beyond the permitted limit.
Step 5: Watch the pressure gauge
Observe the gauge for the time specified in the service procedure. A pressure drop may indicate a leak, but the tester connection must also be checked.
Step 6: Inspect the cooling system
Look for fresh coolant around hoses, radiator seams, the water pump, thermostat housing, and other accessible connections.
Step 7: Release pressure safely
Release the tester pressure slowly according to the tool instructions before removing the adapter.
How To Read Pressure Test Results
A stable pressure reading suggests that the system is holding pressure under the conditions of the test. It does not prove that every part is leak-free. A leak may occur only when the engine is hot, when the vehicle is moving, or when the system experiences a different load.
A slow pressure drop can point to a small external leak, a weak seal, or an internal leak. Inspect the system carefully and confirm that the tester and adapter are not leaking.
A rapid pressure drop suggests a larger leak or a significant loss of pressure. Look for visible coolant around the system. If no external leak appears, further testing may be needed to check for internal coolant loss.
Pressure loss alone does not identify the damaged component. The mechanic must locate the fluid or use additional tests to confirm the source.
Pressure stays steady
No major pressure loss is detected during the test. Check for intermittent leaks, cap problems, and internal leaks if coolant loss continues.
Pressure drops slowly
Look for small seepage around seals, fittings, hoses, and radiator joints. Check the tester connection as well.
Pressure drops quickly
Look for a significant external leak. If no leak is visible, arrange internal leak testing.
Why The Radiator Cap Needs A Separate Test
The pressure cap helps control the pressure inside the cooling system. A weak cap may release coolant too early or fail to maintain the pressure needed for normal operation.
A cap can look clean and undamaged but still fail its pressure test. A technician can use a suitable cap tester to check its opening pressure and sealing ability.
Replace the cap only with the correct specification for the vehicle. A cap with the wrong pressure rating can create new cooling system problems.
How To Diagnose Hidden And Internal Coolant Leaks
If the coolant level keeps falling but no external leak appears, the next step is to check for hidden or internal coolant loss. These problems need more than a basic inspection.
A hidden external leak may evaporate on a hot engine part or collect behind a cover. An internal leak can allow coolant to enter the combustion chamber, engine oil, transmission cooler, or another enclosed passage.
A mechanic may combine pressure testing with UV dye, a combustion gas test, a cylinder leak-down test, or a borescope inspection. Each method checks a different part of the problem.
UV dye testing
A coolant-compatible fluorescent dye is added in the amount specified by its manufacturer. A UV lamp can then help reveal dye at a hidden external leak.
Combustion gas testing
A chemical tester checks whether combustion gases are entering the cooling system. A positive result calls for further diagnosis of the head gasket, cylinder head, or engine block.
Cylinder leak-down testing
Controlled air pressure is applied to an individual cylinder. Air bubbles in the cooling system may indicate a path between the cylinder and coolant passage.
Borescope inspection
A small camera can help inspect the inside of a cylinder for signs of coolant entering the combustion chamber.
Using UV Dye To Find A Small Leak
UV dye can be useful when coolant escapes in very small amounts. The dye circulates with the coolant and may leave a visible fluorescent trace at the leak point.
Use only dye approved for the vehicle’s cooling system. Follow the product instructions for the correct amount and inspection method. A black light can then help reveal the dye around hose joints, radiator seams, pump seals, and other areas.
Clean suspected areas before testing when appropriate. Old coolant stains or dye from an earlier repair can confuse the result. A fresh trace is more useful when the surrounding surface is clean.
UV dye is mainly a way to find external leaks. It cannot, by itself, confirm or rule out a failed head gasket or another internal engine problem.
Checking For A Blown Head Gasket
A failed head gasket can allow coolant to enter a combustion chamber or mix with engine oil. A cracked cylinder head or engine block can cause similar symptoms.
Possible clues include falling coolant levels, persistent white exhaust after warm-up, rough starting, overheating, bubbles in the coolant, or oil contamination. However, none of these signs alone proves that the head gasket has failed.
A chemical combustion gas test can help identify exhaust gases in the cooling system. Compression and cylinder leak-down tests can provide more information about the condition of the cylinders and sealing surfaces.
Milky oil can suggest coolant contamination, but a small amount of pale residue under the oil filler cap may also result from condensation during short trips or cold weather. Check the dipstick, coolant condition, and other symptoms before drawing a conclusion.
Checking The Heater Core And Other Internal Coolers
The heater core is a small radiator inside the dashboard. It uses hot coolant to warm the air that enters the cabin. A leaking heater core may produce a sweet odor, fogged windows, or damp carpet.
Some vehicles also use coolant to help control the temperature of an engine oil cooler or transmission fluid cooler. A failure in one of these components may allow fluids to mix. A mechanic can inspect the coolant and other fluid samples for signs of contamination.
Some diesel engines also use coolant-cooled EGR components or turbocharger parts. A leak in these systems may cause coolant loss without an obvious puddle under the engine.
The exact test depends on the engine design. A technician should use the vehicle’s service information rather than assume every model has the same internal coolant paths.
Match The Symptoms To The Likely Leak Source
The location and timing of a coolant leak can help narrow down the possible cause. However, these clues are not final proof. A pressure test or another suitable diagnostic test should confirm the damaged part before replacement.
Use the following guide to decide which area deserves attention first. Note when the symptom occurs and whether the coolant level changes between cold checks.
Coolant puddle near the front of the vehicle
Check the radiator, radiator hoses, reservoir, water pump, and nearby coolant connections. Remember that airflow can move fluid away from its original leak point.
Sweet smell after switching off the engine
Check for a small leak around hot hoses, radiator seams, the pressure cap, thermostat housing, and water pump.
Coolant smell inside the cabin
Inspect the heater core and heater hose connections. Look for damp carpet and a greasy film on the windshield.
Coolant loss with persistent white exhaust
Arrange a combustion gas test, cylinder leak-down test, and other internal engine checks.
Coolant loss with no visible leak
Check for hidden external seepage, a faulty pressure cap, a heater core leak, or internal coolant loss.
Coolant level changes after recent service
Air trapped during filling may be leaving the system. Check the vehicle’s correct bleeding procedure and monitor the cold coolant level.
Coolant escapes only during heavy driving
A weak hose, radiator seam, cap, or connection may leak only under higher temperature and pressure. Arrange a controlled inspection.
Engine overheats and cabin heat suddenly disappears
A low coolant level, air pocket, or loss of circulation may be present. Stop driving and arrange a safe inspection.
Why A Recent Coolant Refill Can Change The Level
A cooling system that has just been serviced may contain trapped air. As the air moves out through the correct bleeding process, the reservoir level can change.
This does not automatically mean there is a new leak. However, the system must be filled and bled according to the manufacturer’s instructions. Some vehicles need a special bleeding procedure or vacuum filling equipment.
Once the system has been bled, compare coolant levels when the engine is fully cold. A continued drop means the system needs further inspection.
Common Coolant Leak Diagnosis Mistakes
A rushed inspection can lead to the wrong repair. Coolant systems contain several connected parts, so a leak near one component may come from another part above it.
The best approach is to confirm the leak source before replacing anything. Avoid relying on one symptom, one pressure reading, or the color of the fluid.
Opening the radiator while hot
This can release hot coolant and steam. Always wait until the engine is fully cold before opening the cooling system.
Assuming every puddle is coolant
Air conditioning condensation is usually clear water. Check the fluid and coolant reservoir before deciding that a leak exists.
Identifying coolant by color alone
Different coolant formulas use different dyes. Select replacement coolant by the vehicle manufacturer’s required specification, not color alone.
Using the wrong pressure during testing
Too much pressure can damage cooling system parts. Always follow the exact vehicle-specific test pressure.
Replacing the head gasket too soon
White exhaust or milky residue is not enough to prove a head gasket failure. Use suitable tests to confirm the source.
Ignoring the pressure cap
A weak cap can release coolant and cause pressure problems. Test the cap separately before replacing more expensive parts.
Using stop-leak products as a repair
Sealant products do not replace proper diagnosis. Some products may restrict narrow cooling passages or heater cores. Follow manufacturer guidance before using any additive.
Repeatedly adding coolant without fixing the leak
Frequent top-ups hide the real problem and may allow the engine to overheat without warning.
Why Coolant Color Does Not Confirm Compatibility
Coolant colors are not universal standards for chemical compatibility. Two products with the same color may have different additive packages, while compatible products may have different colors.
Check the owner’s manual or approved service information for the exact coolant specification. Do not mix products simply because their colors match.
Using the wrong coolant can affect corrosion protection and long-term cooling system performance. If the fluid type is unknown or mixed incorrectly, ask a qualified technician whether the system needs to be drained and refilled.
How To Confirm The Repair And Prevent Future Leaks
After finding the leak, repair the confirmed source and test the cooling system again. Replacing a damaged hose, radiator, pump, cap, or gasket should be followed by a check for any remaining pressure loss.
Use coolant that meets the vehicle manufacturer’s specification. Follow the correct mixture instructions if the product is concentrated. Pre-mixed coolant should not be diluted unless its instructions specifically require it.
Bleed the cooling system using the correct procedure. Trapped air can cause poor heater performance, changing coolant levels, and overheating. Some vehicles need special filling tools to remove air from the system.
After the repair, monitor the coolant level during several cold checks. Compare the readings under similar conditions and look for fresh residue around the repaired area.
A successful repair should stop the coolant loss. The temperature gauge should remain within its normal operating range, the heater should work as expected, and the system should hold pressure according to the manufacturer’s test procedure.
Use the correct replacement parts
Choose hoses, seals, caps, and other parts that meet the vehicle’s fit and specification requirements.
Use the correct coolant
Follow the vehicle manufacturer’s coolant specification and mixture instructions.
Bleed the system correctly
Remove trapped air using the approved filling and bleeding process.
Repeat the pressure test
Confirm that the repaired system holds the specified pressure and shows no new leakage.
Monitor cold coolant levels
Check the reservoir at similar temperatures and on level ground to identify any continued coolant loss.
Keep the cooling system clean
Follow the recommended maintenance schedule and repair damaged parts before corrosion or repeated overheating causes more problems.
Safe Coolant Cleanup And Disposal
Automotive coolant can be harmful if swallowed. Many antifreeze products contain ethylene glycol, which can cause severe poisoning in people and animals. Never leave a coolant spill where children or pets can reach it.
Use suitable protective equipment and clean up spills promptly. Keep unused coolant in its original, clearly labeled container with the cap closed. Never transfer it into a drinking bottle or food container.
Do not pour used coolant onto the ground, into a storm drain, or down a household drain. In the United States, contact your local waste management department or household hazardous waste facility for approved collection and recycling options.
If someone may have swallowed antifreeze, call Poison Control at 1-800-222-1222 immediately. Do not wait for symptoms to appear.
When Should A Mechanic Diagnose The Coolant Leak?
A professional inspection is the right choice when the leak cannot be located safely or when the evidence points to an internal engine problem. A mechanic has access to vehicle-specific service information, pressure testing equipment, UV inspection tools, and engine diagnostic equipment.
Ask the shop to identify the actual leak source before approving major repairs. A useful diagnosis should explain the test performed, the result, the damaged component, and why that component needs repair or replacement.
A pressure test may be enough to find a damaged hose or radiator seam. A hidden leak may require dye testing or inspection after the engine reaches a specific temperature. Internal coolant loss may require combustion gas, compression, or cylinder leak-down testing.
If the engine has overheated, ask the mechanic to check for secondary damage as well. Repairing the original leak does not always correct damage caused by running the engine without enough coolant.
Do not drive the vehicle to the shop if coolant is escaping rapidly, the engine is overheating, or a warning light indicates a serious cooling problem. Arrange a tow instead.
The coolant level keeps falling
Repeated coolant loss needs a proper inspection, even if the vehicle still appears to run normally.
The pressure test shows unexplained pressure loss
A mechanic can check for hidden leaks, internal coolant loss, and problems with the pressure cap.
There is white exhaust after warm-up
Further engine testing can help identify a failed head gasket or damaged cylinder head.
Coolant and engine oil appear mixed
The vehicle needs prompt inspection for an internal leak or a failed oil cooler.
The vehicle has overheated
A professional should check the cooling system and assess possible engine damage before the vehicle returns to normal use.
Frequently Asked Questions
Q
How Do I Find A Coolant Leak That I Cannot See?
Start by checking the coolant level when the engine is fully cold. Look for dried residue around hoses, radiator seams, the reservoir, thermostat housing, and water pump. Also check the passenger-side carpet and the area around the dashboard for signs of a heater core leak.
If the source remains hidden, a cooling system pressure test can help reveal small leaks. A compatible UV dye may also help locate a leak that is difficult to see. If the coolant level continues to fall without an external leak, arrange internal engine testing.
Q
Can A Coolant Leak Cause An Engine To Overheat?
Yes. A coolant leak can reduce the amount of fluid available to carry heat away from the engine. When the coolant level becomes too low, the cooling system may not remove heat properly.
The engine can overheat and suffer damage to its head gasket, cylinder head, or other parts. Stop driving if the temperature warning appears or the gauge enters the red zone.
Q
How Much Pressure Should A Cooling System Hold?
The correct test pressure depends on the vehicle. Different cooling systems use different pressure ratings, so there is no single pressure that is correct for every car.
Use the manufacturer’s service information and the correct pressure tester adapter. Never exceed the specified test pressure because excessive pressure can damage hoses, seals, radiators, and other cooling system parts.
Q
Can A Bad Radiator Cap Cause Coolant Loss?
Yes. A weak or damaged pressure cap may release coolant before the system reaches its correct operating pressure. Coolant may escape through the overflow hose or leave dried residue around the reservoir.
A pressure cap can look normal and still fail. A separate cap test can confirm whether it holds and releases pressure within the vehicle’s specified range.
Q
Does A Coolant Leak Always Mean A Bad Head Gasket?
No. Most coolant leaks can come from external parts such as hoses, radiator seams, the reservoir, thermostat housing, water pump, or heater hoses. A head gasket is only one possible source.
A head gasket problem becomes more concerning when coolant loss occurs with persistent white exhaust after warm-up, engine misfires, overheating, or signs of fluid mixing. A combustion gas test and other engine tests can help confirm the problem.
Q
Why Does My Coolant Level Drop After A Repair?
A small change may occur after a cooling system has been refilled because trapped air is being removed during the correct bleeding process. The coolant level may settle as the system completes its first heat and cool-down cycles.
However, the level should stabilize after the system has been properly filled and bled. If it continues to fall during cold checks, the system needs another inspection for a leak or an incorrect filling procedure.
Q
Can I Drive My Car With A Small Coolant Leak?
A small leak can become worse without much warning. Whether a vehicle can be moved safely depends on the rate of coolant loss, the engine temperature, and the vehicle manufacturer’s guidance.
Do not drive if the temperature rises, a warning appears, steam develops, or coolant is escaping rapidly. The safest option is to arrange a tow when the cooling system cannot maintain a safe temperature.
✦ Wrapping Up
Conclusion
Finding a coolant leak starts with a simple check. Let the engine cool, inspect the reservoir, and look for signs of fluid around the hoses, radiator, water pump, and other cooling system parts. Record the coolant level during cold checks so you can confirm whether the system is losing fluid.
If a visual inspection does not reveal the source, a cooling system pressure test is a useful next step. UV dye can help find small external leaks, while combustion gas testing and cylinder leak-down testing can help identify internal engine problems.
Do not replace major parts based on symptoms alone. Confirm the source before approving a repair, use the correct coolant, and make sure the system is filled and bled properly after the work is complete.
Most importantly, never ignore an overheating warning or open a hot cooling system. A timely inspection can prevent a small leak from turning into a major engine repair.
💡 Key Takeaway
Start with a fully cold engine. Check and record the coolant level, inspect all accessible hoses and connections, and look for dried coolant residue. If the source is not visible, arrange a vehicle-specific cooling system pressure test. Stop driving if the engine overheats, and confirm that the system holds pressure after the repair.
About john Adword
John Adword has tested and reviewed car seat covers and interior accessories for 5 years, evaluating fit, material performance, and long-term wear across a range of vehicles and climates. His testing approach follows the same methodology used across car Reviewer Plus's product reviews — hands-on installation, real-world use, and comparison against manufacturer claims — with an ongoing focus on tracking new seat cover materials and cooling technology as they come to market.